Microphone Repair Instructions
Click here for downloadable version of Microphone Repair Manual
Content:
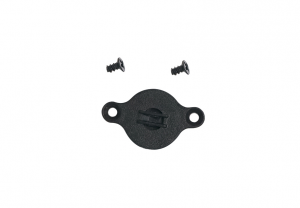
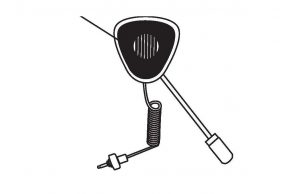
x1: Microphone
x2: Screws
- Take out the old microphone.
- Place the new microphone into your head accessory.
- Make sure the PINS are matched up. This is very important.
- Once the PINS are matched up, screw the new microphone in using the two screws provided.
- The microphone being slightly raised is normal.
Speaker Repair Instructions
Click here for downloadable version of Speaker Repair Manual
Content:
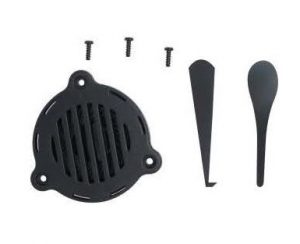
x1: Speaker
x3: Screws
x1: Plastic slice
x1: Stainless hook
- For the boom microphone, first remove the Velcro tape. (If you are changing out the speaker on a helmet speaker pad, this is not relevant.)
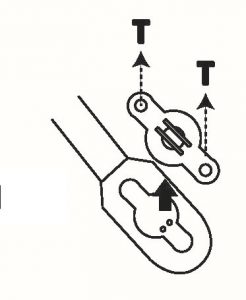
- Take out the screws.
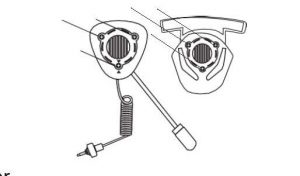
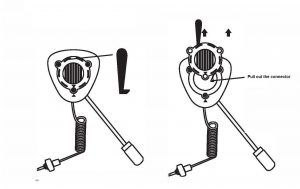
- Use the Stainless Steel hook to take out the old speaker. Pull out the connector.
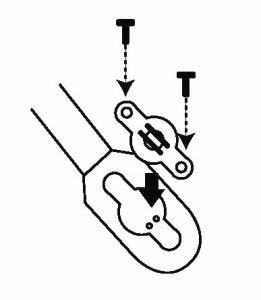
- Install the new speaker:
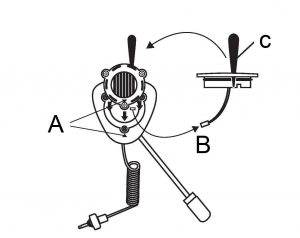 A. Aligning the arrow mark to arrow mark B. Insert the new speaker connector. C. Insert the plastic slice tool over the O-ring, insert the new speaker and take out the slice tool. ** Important step as this let’s the air out. If this step is skipped, it could cause the sound to be low.
 - For the boom microphone, place the Velcro tape back onto the speaker area.
The microphone and speaker piece can be replaced on the following head accessories:
B01R: Sports Headset
B01HR: Surf Hat
B01CR: Baseball Cap
B02R: Single Sided Helmet Speaker Pad
B03R: Double Sided Helmet Speaker Pad
B02G: Single Sided Helmet Speaker Pad for GATH helmet
Warranty:
All microphone and speaker pieces are covered under warranty for 6 months from the date of purchase. You are required to return the item to BbTALKIN USA you are seeking warranty coverage on.